Description
Price: $119.00 – $80.72
(as of Oct 31, 2024 04:01:37 UTC – Details)
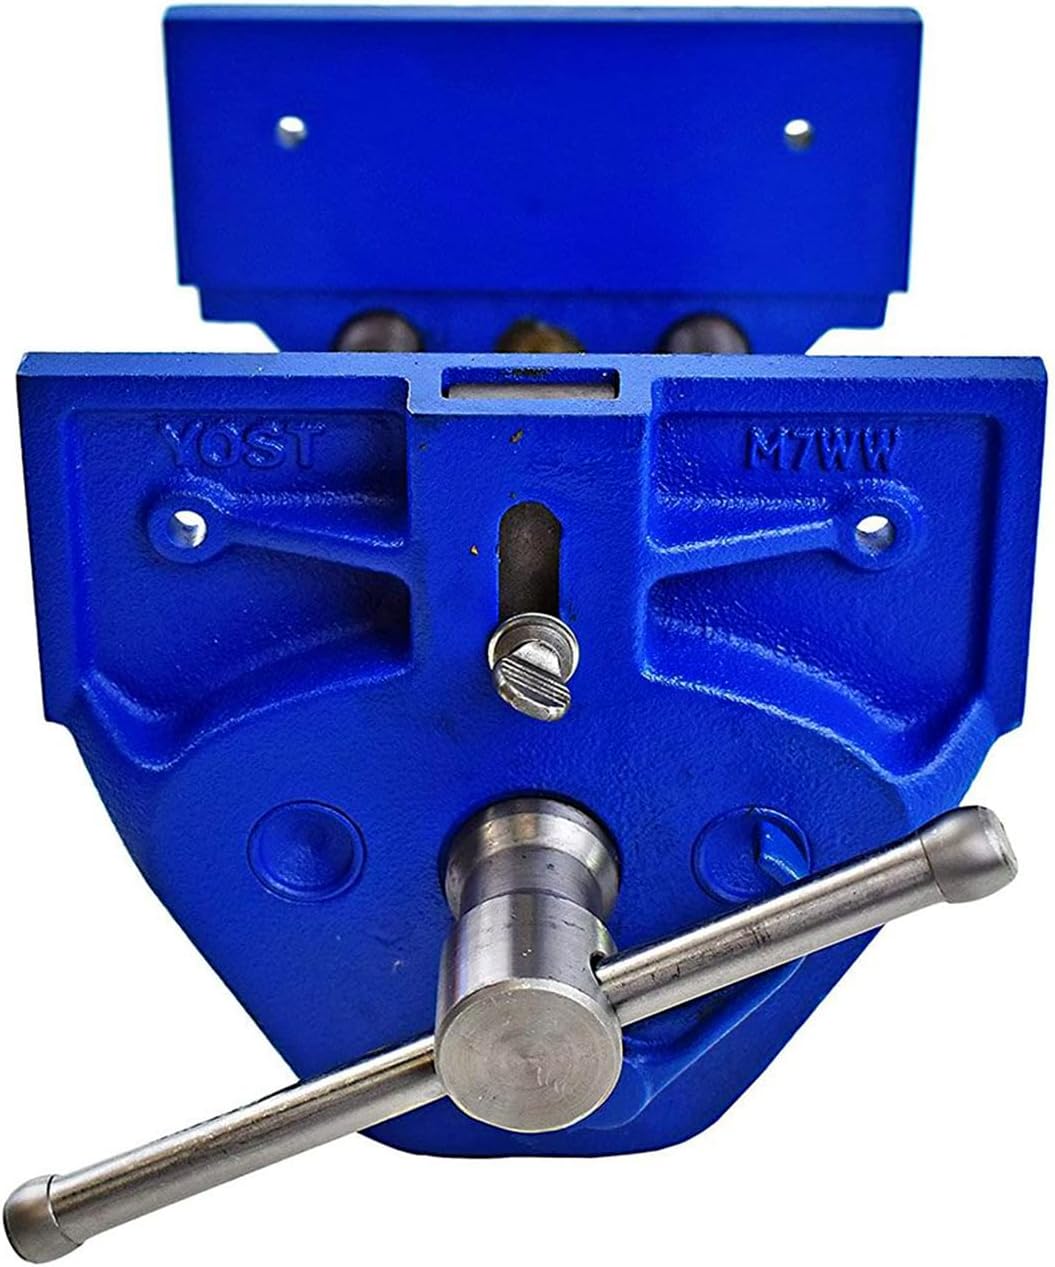
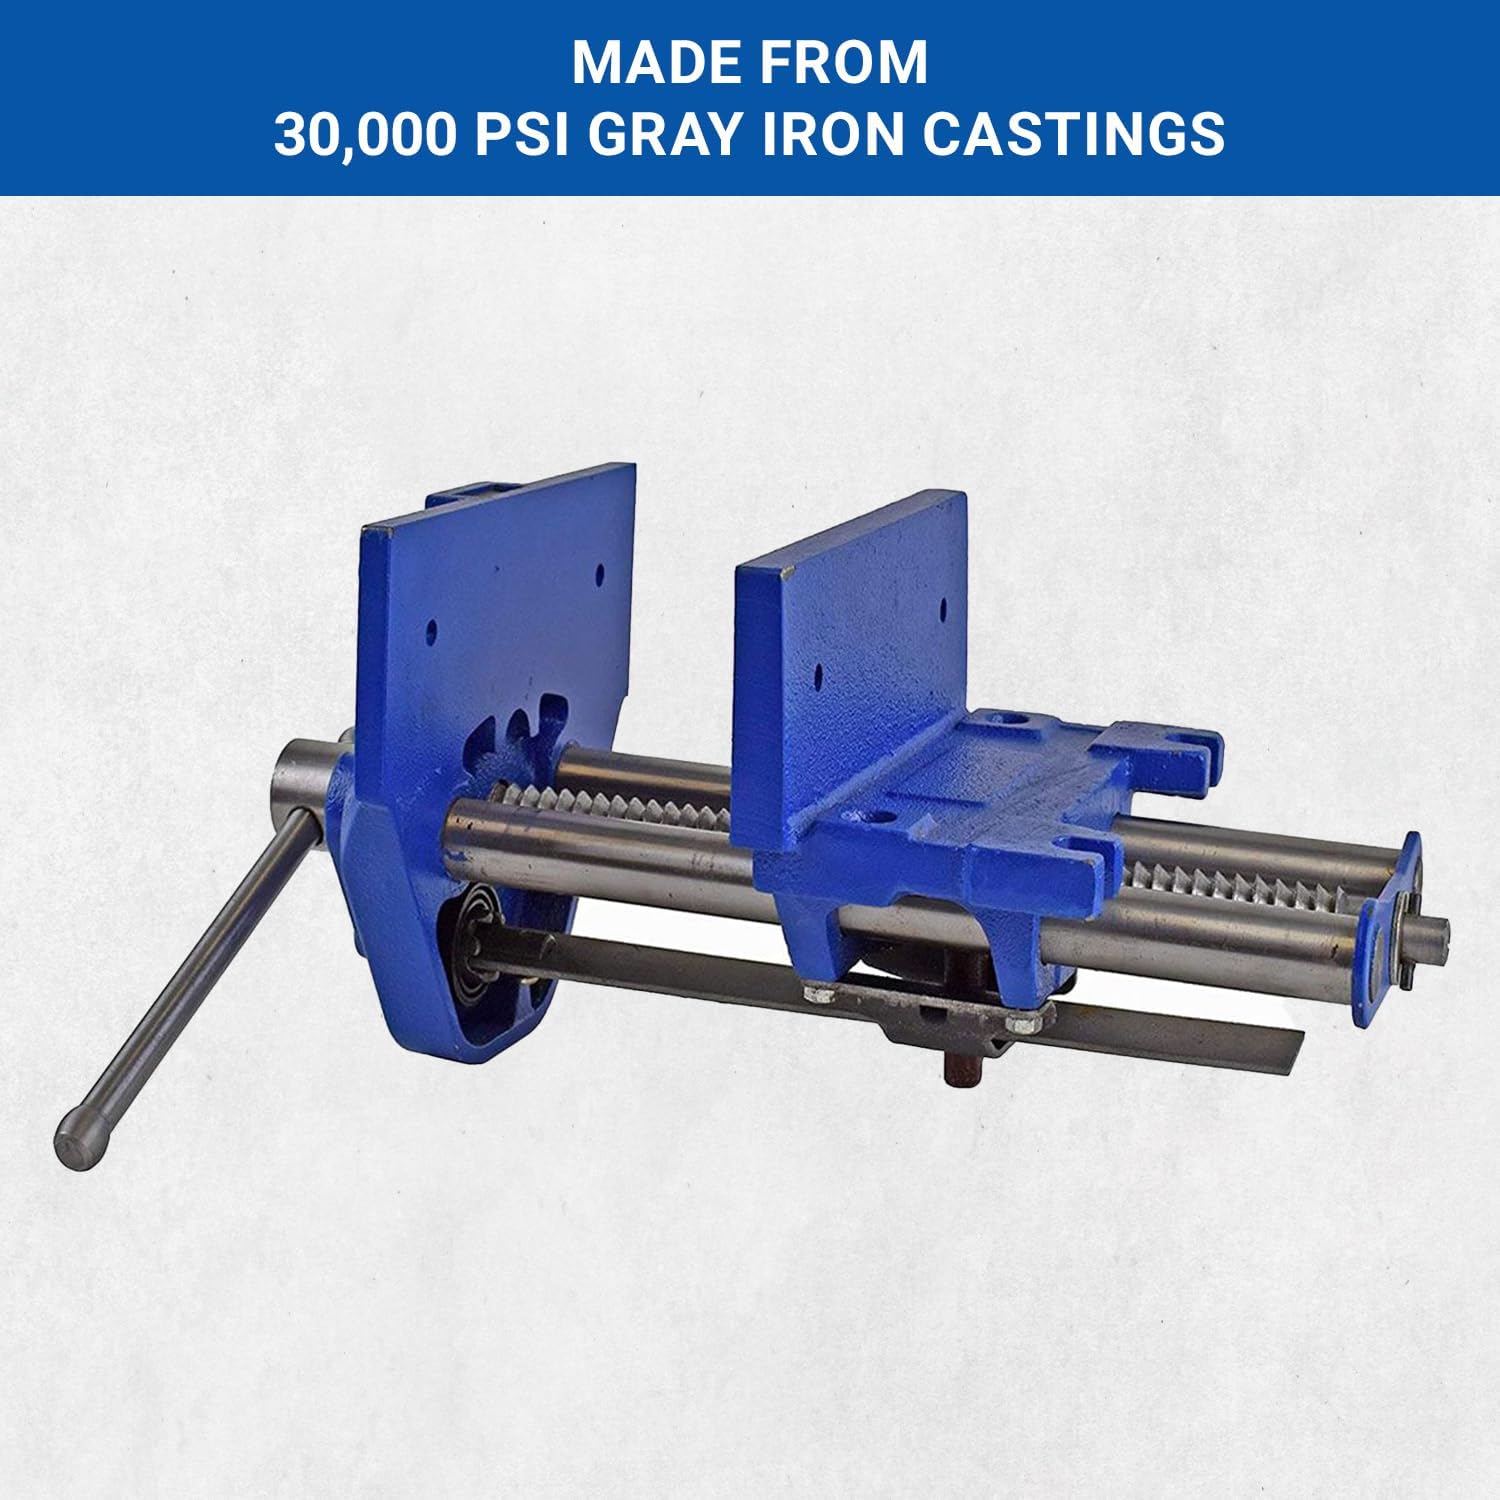
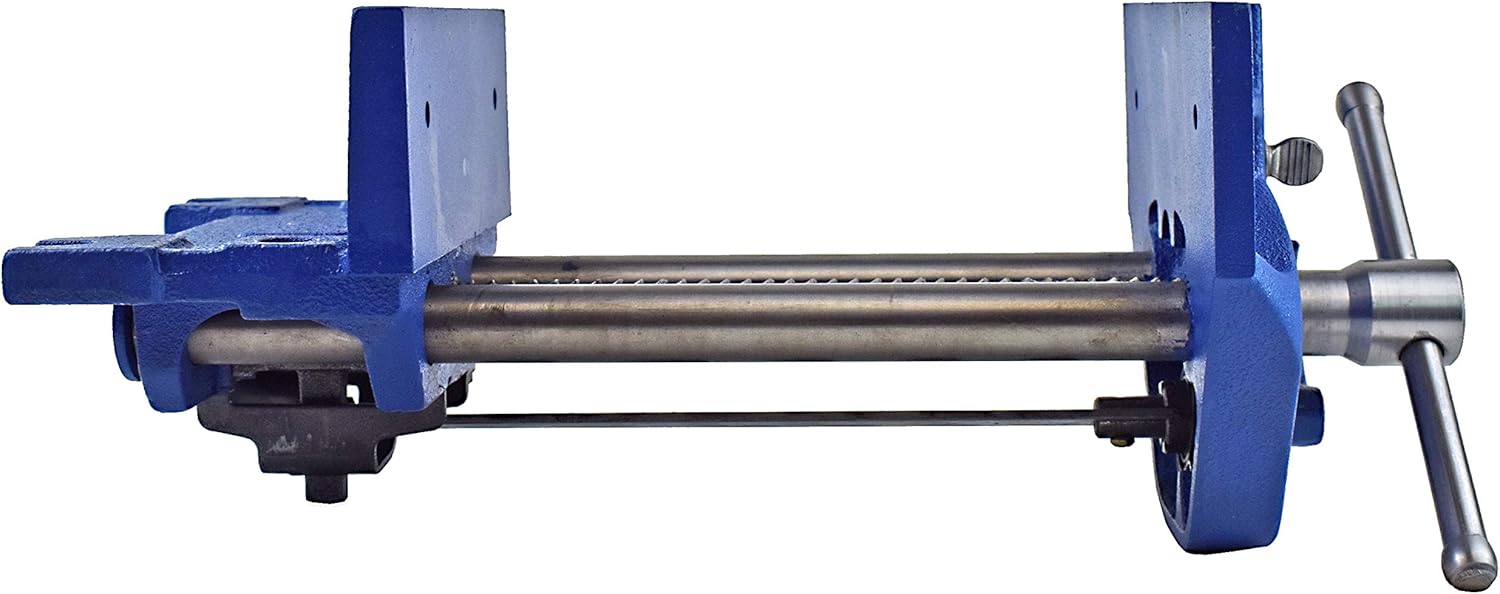
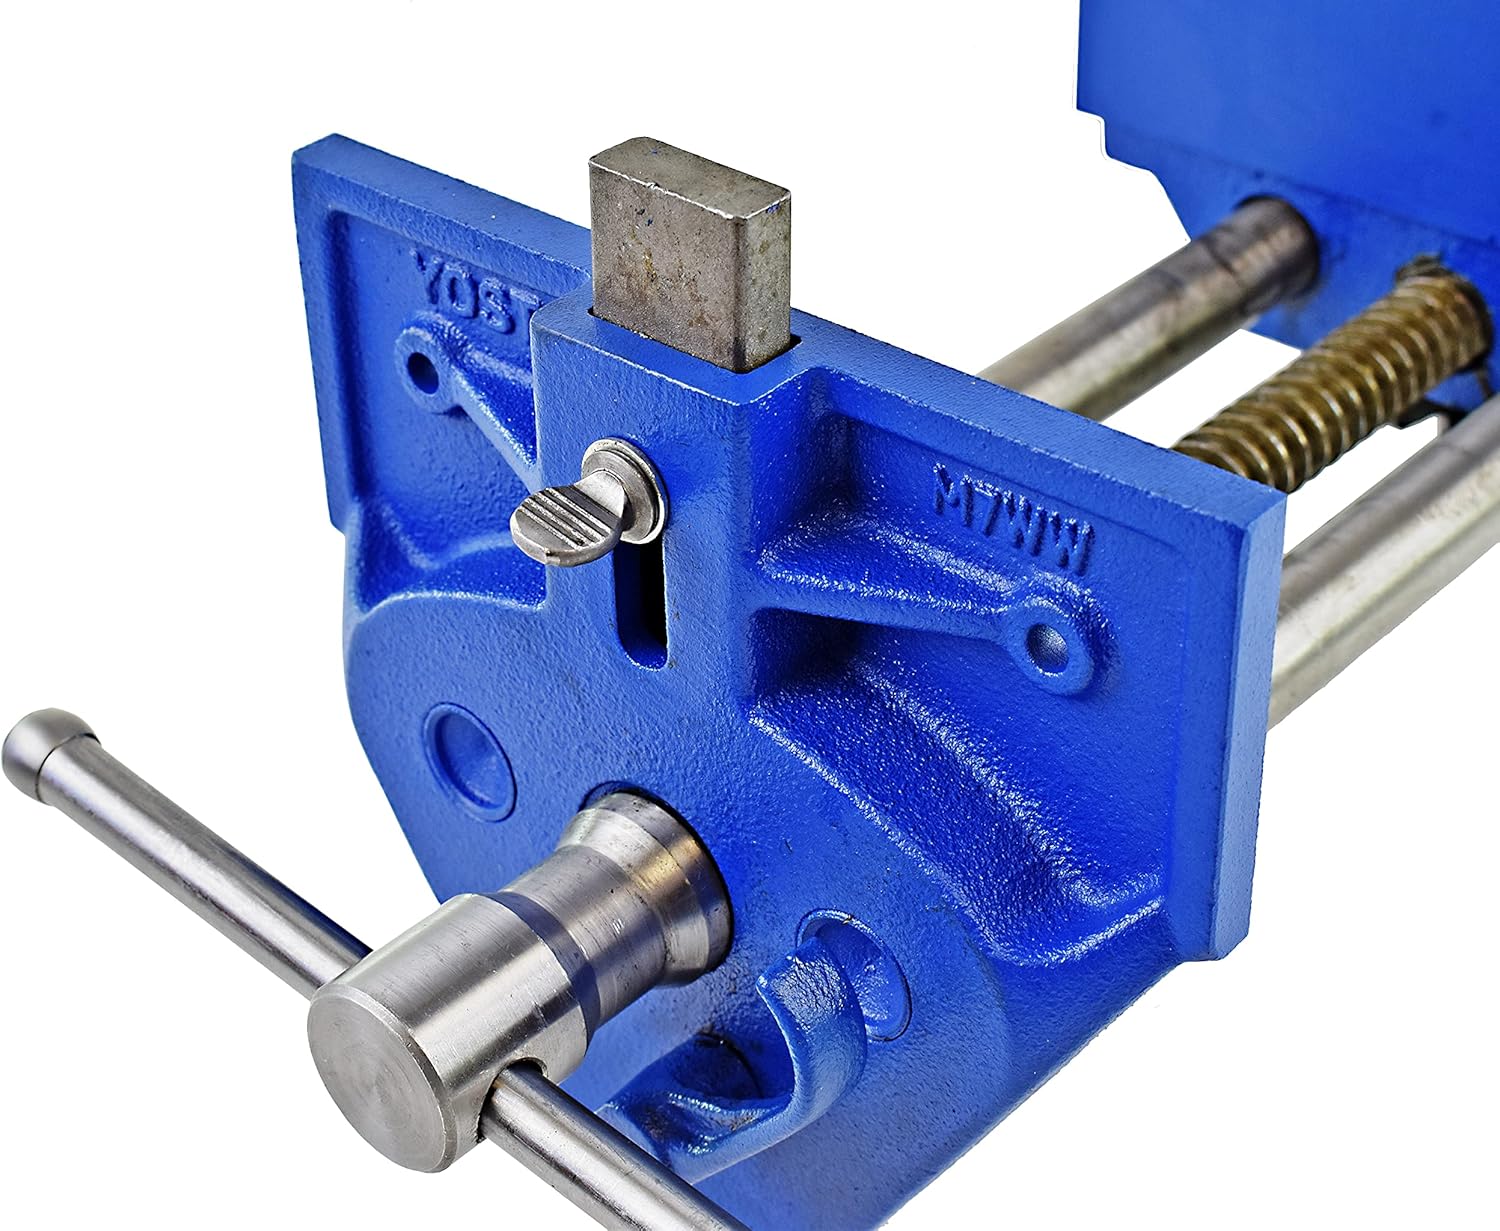
This woodworking vise is designed for home carpentry or professional woodwork. The vise is built from rugged cast iron. It has a quick-release lever that disengages the screw for speedy adjustment and a buttress-threaded main screw for powerful clamping. Yost Vises has been producing high-quality vises and vise accessories since 1908. We supply our products to both large distributors and individual craftsmen throughout the world ranging from industrial-grade vises, professional-grade vises, workshop-grade vises, light to heavy-duty vises, multifunction vises, welding vises, etc. Our products meet or exceed the Industrial Standard of Federal Specification GGG-V-410A, providing consumers with quality products that last for years at a great price.
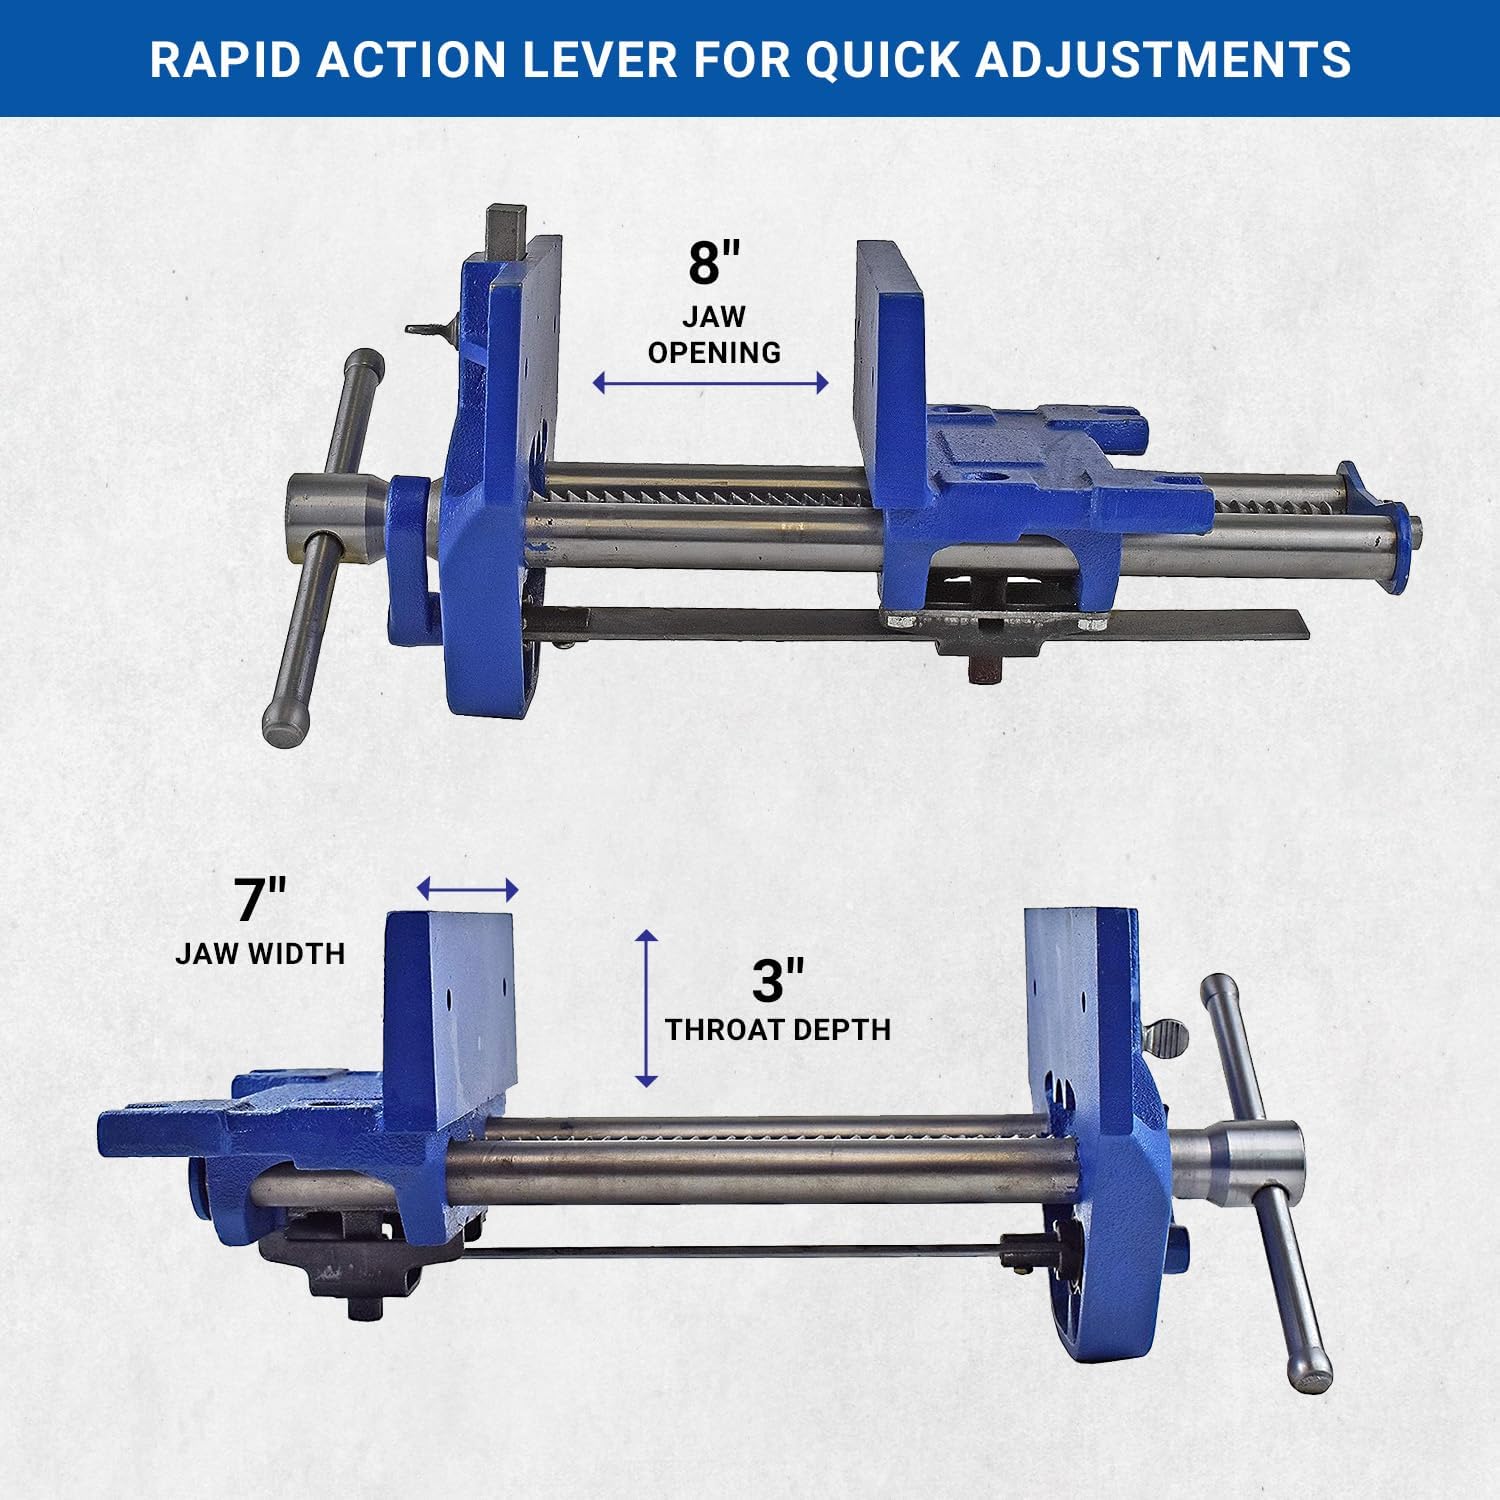
WOODWORKING VISE: The Yost Vises M7WW 7-inch Rapid Action Woodworking Vise is made from 30,000 PSI cast iron with chrome plated steel sliding T-bar handle and steel guide rails. Has a rapid action lever for quick adjustments.
TECHNICAL SPECS: Jaw Width 7″ (17.78 cm), Jaw Opening 8″ (20.32 cm), Throat Depth 3″ (7.62 cm).
HOW TO USE: To open the vise turn the vise handle counterclockwise. This will move the front jaw away from the stationary jaw to close and turn the vise handle counterclockwise. To use the quick-release feature of this vise, move the lever toward the vise handle. This will disengage the nut and allow you to quickly open or close the vise. The bench dog can be moved in position by loosening the finger bolt on the front of the vise.
YOST VISES QUALITY: Every Yost Vises tool is engineered to have high standards of quality, strength, and durability. We value quality over quantity and manufacture products that are safe and easy to use. We offer lifetime tech support to back our quality guarantee.
SAFETY INFORMATION: Misuse of vises can cause serious injury to eyes, hands and or other body parts. Vises must be set up and used properly. Before setup and use, read, understand, and follow all instructions outlined in the manual.
WARRANTY: Comes with a 1-year limited warranty and 90-day return.
Customers say
Customers appreciate the build quality, value for money, and ease of installation of the hardware clamp vise. They mention it’s super solid, holds wood stock very securely, and is well worth the price. Some also say it works well and the release speed is easy to use.
AI-generated from the text of customer reviews








Aframer –
The machined parts fit well and work properly.
The finish is adequately smooth and the fit and accuracy of the moving parts is very good. The vise was easy to install on my homemade workbench. The cast parts seemed to have good ductile strength, not brittle like poor quality cast parts can be. I know there are woodworking vises with greater precision and perhaps more versatility, but for my home shop this is a very useful addition at an attractive price point. I installed soft wood jaws using the provided mounting holes and the vise is non-marring to my workpieces.
Jon –
Great bench vise
It is solidly built and turns smoothly. The quick release mechanism is great, I like it more than the other type of quick release vises I have had. Great overall value.
Redfox –
Buy it!
I recently received and installed the Yost 7 inch model M7WW. Very pleased with it. It seems almost stupid heavy, but good vises are. It is a nicely finished, well made, quality product and the rapid action feature makes it a pleasure to use. It has great clamping force – no more vise jaw racking and work pieces slipping. Limited use so far, but It held everything solidly while I sawed and planed material. The vise is easily operated with one hand, even the rapid action feature, leaving the other hand free to position the material to be clamped. Be aware – this thing is heavy, the shipping preservative makes it slick, and it comes with very sharp edges. While lugging the boxed vise downstairs to my shop, I pretty much knew I would need to reinforce my light weight workbench to handle this blue monster. Working over a layer of cardboard on my work bench, I removed the preservative first, using a citrus based solvent and paper towels. Be careful around the sharp edges of the vise jaws. Cleaning the vise threads was easier after the vise was mounted: I put several layers of paper towels over the edge of a putty knife and held the blade into the thread recesses while turning the vise handle. After cleaning away the preservative, I spent several minutes with a file removing the flesh eating sharp edges along the machined surfaces, vacuumed up the metal filings and a little flesh, then washed my very dirty hands. I applied Boeshield T-9, a lubricant and metal protector that leaves a dry surface to minimize sawdust build up. I then quickly mounted the vise to my bench and lived happily ever after! In my dreams, anyway. My installation become a bit complicated. If interested in ghastly details, continue reading. I set my workbench upside down on a table so I could better access the vise mounting area. Two problems became immediately apparent. Alas, there would be more but less apparent problems later on. First, my work benchâs seemingly 2-1/2 inch thick top was not solid. It has a 3/4 inch thick top set inside 3/4 by 2-1/2 inch wide skirt boards. This leaves a void of 1-3/4 deep by about 4 by 18 inches in the area where the vise would be mounted. Yost recommends the bench top be at least 2-3/8 inches thick where the vise is to be mounted. The second, immediately apparent issue involved the benchâs wooden crosspiece that supported the top and the legs. This crosspiece interfered with the viseâs sliding mechanism that hangs about 3-3/4 inches below the bottom of the bench top, is about 5 inches wide, and projects back under the bench about 12-1/2 inches from the edge of the bench top. If I would have mounted the vise on the side of the bench top instead of the end, I might have avoided this leg crosspiece interference problem, but that wasnât the location I wanted. For the void issue, I decided to fill that area in with 2x material ripped and cut for a snug fit flush with the bench top skirting, then glued, screwed and clamped all of the pieces into place. I sanded the varnished bench top under surfaces prior to gluing for a better glue bite. I added a 2-1/2 inch wide piece of 2×4 to the end of the bench top to provide a solid place for anchoring the front two vise mounting lag screws, rather than in a glue joint. Then I covered the bottom of this ripped 2×4 and the filled in area with a layer of 3/4 inch plywood, glued and screwed into place. While the plywood layer would put the top of the vise 3/4 inch below the bench top, it reduced the crosspiece interference problem to an acceptable amount of crosspiece material to be removed. It also added reinforcement to the area. The vise would now mount against the plywood and the 2×4. Apparently I was becoming a vise snob as I felt the need to stain and varnish the added wood before attaching the vise. Finally ready to mount the vise, I clamped the vise into position, drilled 1/4 inch pilot holes for the four 5/16 inch diameter lag bolts (not included), and fastened the vise to the bench. This area of my bench top was now 3-1/4 inch thick, and with the added thickness of the vise bottom and a flat washer, I used 3 inch long lag screws. I carefully set the now much heavier work bench back on its feet. With the vise anchored to the bench, the viseâs smooth and rapid action was amazing. The added plywood layer also meant that the vise dog would no longer extend above the top of the bench. I couldnât find longer dogs or dog extensions, but did find an online site offering a steel bar measuring 1/2 x 1 x 4 inches. After a bit of grinding and filing the 1/2 inch thickness back to about .47 inches on the lower 2-1/2 inches of the steel bar, it now fits into the dog pocket of the vise. I now have a drop-in steel vise dog that extends an inch above my bench top when needed. With the new vise fully extended, the handle is about 18 horizontal inches away from the nearest leg pair. Thatâs a lot of overhang on a fairly light work bench. With the vise closed, the overhang is about 11 inches. I cut pieces of 2×4 to make two bench leg âside extensionsâ that were 20 inches long, tapered them for a better look, and also stained and varnished them (that vise snob thing). These were screwed to the bottom part of the two bench legs closest to the vise, with the 1-1/2 inch edges extending toward the vise, touching the floor, and reducing the overhang by 3-1/2 inches. This seemed effective and also noticeably stiffened that pair of legs. See the attached photo, which also shows modifications for a different project. There was still some undesirable rocking of the workbenchâs legs, so I made a 14 inch long diagonal brace for each leg using 1×4âs mitered at 45 degree at both ends, and screwed them to the bench top skirt boards and to the legs. This made a big improvement in the benchâs stability. Vise jaw faces. The jaw face mounting holes in the vise jaws are not threaded, and the front jaw face mounting holes are not aligned with the rear jaw holes. Wood screws or sheet metal screws will be needed to mount the jaw faces. While the rear jaw face could be attached with screws from the back of the rear jaw, it wonât then be possible to remove the face without removing the vise. I wanted to be able to quickly and easily swap out jaw faces, which meant attaching the rear jaw face after the vise was mounted, with visible but recessed screws, through the rear jaw holes and into the edge of the bench top. It is easier to mark the position of the rear jaw face screw holes on the back of the face before the vise is mounted, by working from the back of the rear jaw. The front jaw face is easily marked and positioned after the vise is mounted. I used 3/4 inch plywood for my first set of jaw faces, and cut them 3-5/8 inches high and 9 inches wide, a bit taller and wider than the 7 inch wide jaws. This put the the top of the jaw facings at the same height as the bench top after my modifications. I knew it would be a bit of a challenge to put this vise on my particular bench, but Iâm glad I made the needed modifications as this vise is so way better than my previous vises. It is truly a bargain – buy it!
bob –
Weighs a ton. Make sure you know what size you really need.
I just got this today. I probably won’t get to use it for its intended purpose for a while, but since I already installed it on my work bench I thought it would be worth sharing my observations. As I get further into woodworking there are times when you want to lock something down solid without damaging it. My big mechanic’s vice is not the tool for that, even if I put something soft in the jaws. So I figured I’d get one of these woodworker’s vises. I doubt I’ll be doing any fine planing or other stuff like that, but I do work on a lot of things that need holding, so I thought this would be a good investment. I just was not sure what size to get. I’m a go big or go home type, so I was tempted to get the 10″ version. Now I’m thinking I probably could have gotten by with the 7″. The 9″ is a monster. I think it will be good for anything I throw at itThe vise seems well made. The screw is smooth and the quick release takes a bit of a squeeze to engage, but it works well too. I knocked it down a star because after I installed the vise it seems to consistently close with a slight gap on the right side. The gap goes away when you tighten it up, so maybe this is just the way these things work. I clamped several different sized pieces of wood up and it seems to hold them all firmly once you tighten it down.I gave it 3 stars for “Easy to Install”. It’s not the vises fault I guess that trying to install a greasy, heavy piece of equipment with lots of sharp edges and pinch points is a challenge. I have a steel workbench with 2″x6″ wood under the steel top for reenforcement. I added a another 2″x6″ plate where the vise was going to mount to try to make it level with the bench top. It tool another 3/8″ shim to take the jaws just slightly below the bench surface. Not mind you, I had tho hold this in place while I figured out what wood to use. My metal C clamps were not quite big enough to hold the vise in place while I did all this. I ended up jacking the vise up to the bottom of the bench with my trusty Harbor Freight Daytona monster jack. Once I got it where I wanted with the extra plates in place, I was able to drill and drive in lag bolts to secure the vise. I also drilled thru the jaw holes so I could set wood for the jaws. All in all it took me about an hour or two of futzing around. And it’s really just temporary since I’m not sure exactly how I’ll be using this and where on the bench makes the most sense. But at least now I know how to set it in place. The smart way would have been to locate the position of the rear bolt holes which have an open slot on the mounting plate. You can put those bolts in your bench, slide the vise in place, then drill and screw in the front ones. Who knows? Maybe the instructions even say how to do that. I should probably look.So far I think I got my $100 worth. Eventually I’ll mount it correctly and put better wooden jaw plates in. I just didn’t want it sitting around in a box waiting till I had the time to “do it right”.
Ric Hawthorne –
Happy Clamper
Purchased the 7â vise to mount on my smaller work table / router table. Could not be happier with the value, and quality of this vise. It works GREAT, was straight forward to mount and setup, and provides a sturdy grip for various work pieces. Going to have to look at getting a bigger one for my other workbench. Lined the jaws with some European maple 13 ply 3/4 plywood, and have been using it like crazy since it arrived.
Marty –
Good Quality Vise
I recently purchased the Yost Vises M7WW Rapid Action Woodworking Vise. The package arrived as promised, and 40 minutes after opening the box, the vise was mounted to my bench. I clamped a 5 ft x 5/4 in x 6 in board in the vise, and it was rock solid. I could not move the board even when pressing down hard on the overhang. I used a hand plane and card scraper to clean up the edges of the board, and the vise held the board tight and did not move. This is a great vise that is well made with heavy cast iron. The directions for mounting the vise were great, and the quick release is a great feature that is easy to use.
Antonio Arellano –
Me sorprendió el producto.Tiene cierre y apertura rápidos, es pesado, se siente fuerte, estoy muy satisfecho cin esta compra.Tamaño suficiente y un poco mas de lo que necesito para iniciar en la carpinterÃa.
Canoneer –
Excellent copy of a Record vice…..and priced VERY nicely at this time.Castings were a tiny bit rough but nothing that was going to interfere with it’s smooth and easy operation. In my case I had to drill out the 2 front cast bolt holes slightly larger to accommodate my choice of 5 inch carriage bolts although 4 inch would have done in a pinch.Someone had mentioned a stiff quick-release arm but mine was silky smooth.Another reviewer mentioned a discrepancy in the mounting points but these are BELOW the mounting surface and do not in any way interfere with the vice’s ease of mounting or it’s final resting place.A quick greasing of the main gear was all I had to do after I flush-mounted it to my bench.As it mounts beneath an existing bench the thickness of the bench-top needs to be approximately 2 3/8 inch and the cut-back notch for the stationary side of the vice about 1/2 inch or so.Easy to install and rock solid when it’s completed.
Joe –
Well built, good looking vice and easy to install. Works as advertised.As shown in photo, I havenât in stalled the wooden jaw faces which will match up wth the top surface of the bench
Holger Drittler –
Funciona muy bien y de acuerdo a mis expectativas.
Miguel Ãngel Francisco Carcamo –
Es una excelente herramienta,a muy buen precio